FAQs
UPI 2.0 – Mandate Registration for SIP (Recurring Payments)
Login : https://online.boimf.in/BOI/Landing
Step 1: Visit the Investor Portal and login if you are an existing user or start a fresh purchase if you are a new investor.
Step 2: Logged in users you can proceed with SIP registration through two convenient options:
- Option 1: Click “TRANSACT” Icon in the Header
- Option 2: Click “ONE TOUCH TRANSACT” on the Dashboard
Option 1: Click “TRANSACT” Icon in the Header:
- Select the “TRANSACT” icon in the header to view various transaction options & Select “SIP/STP/SWP” sub-option.
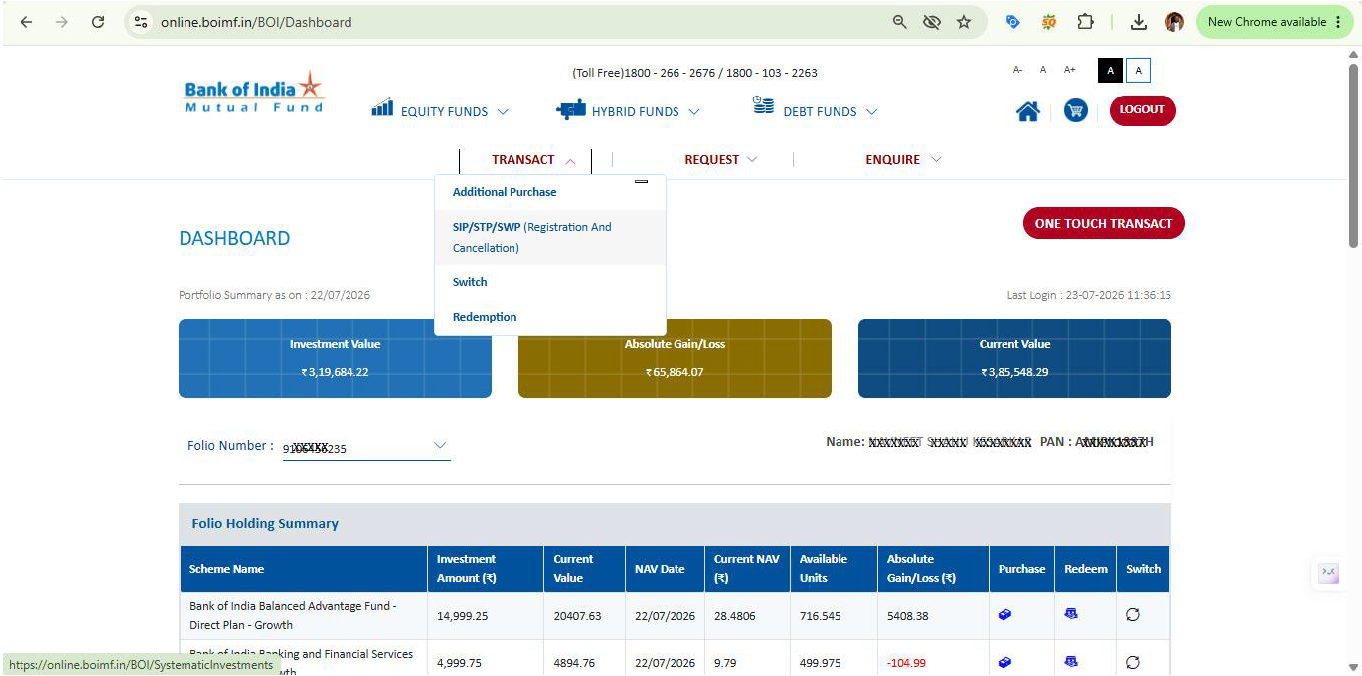
Step 1: SIP Page – Select SIP
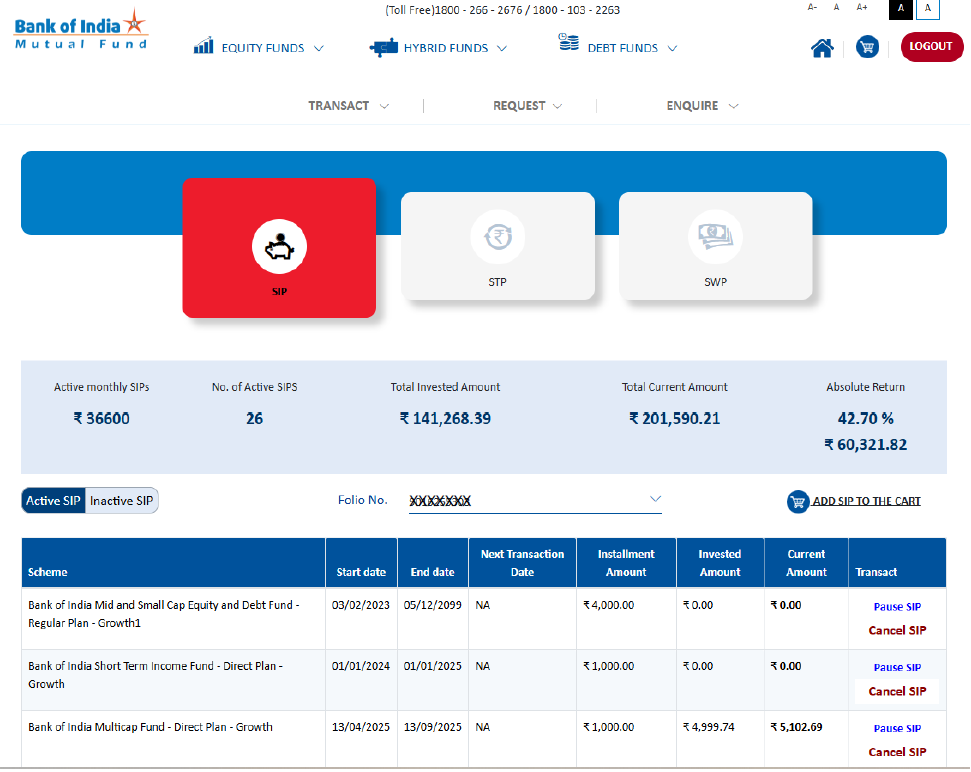
After navigating to the SIP/SWP/STP page:
- Click on the SIP tile to view your Systematic Investment Plans.
- Select the required Folio Number from the dropdown (if you have multiple folios).
- The page will display the list of your Active SIPs along with details such as Scheme Name, Start Date, Instalment Amount, and Current Value.
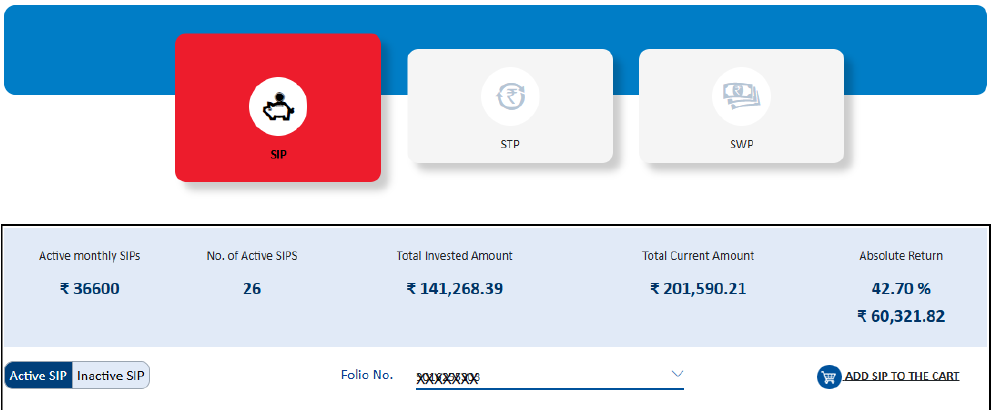
Step 2: Add a New SIP
- Click on Add SIP to the Cart available on the right side of the page.
- You will be redirected to the SIP investment page to select a scheme and proceed with creating a new SIP.
Step 3: Select the Payment Mode
To register your SIP, you need to choose a payment mode for recurring SIP installments. The following options are available to capture your payment consent:
- UPI Mandate – Authorize SIP payments using any UPI-enabled application. Once the mandate is approved, future SIP installments will be debited automatically from your linked bank account. This is a quick and paperless process.
- One-Time Mandate (OTM-UMRN) – Register a bank mandate that authorizes automatic debit of SIP installments from your bank account until the mandate expires or is cancelled.
- iSIP Registration (14-digit URN for Biller Registration) – iSIP registration generates 14-digit Unique Reference Number (URN). One can Login to their respective bank and add 3rd party biller using shared URN.
Using UPI Mandate –
For this journey, select UPI Mandate and proceed by entering the required SIP details.
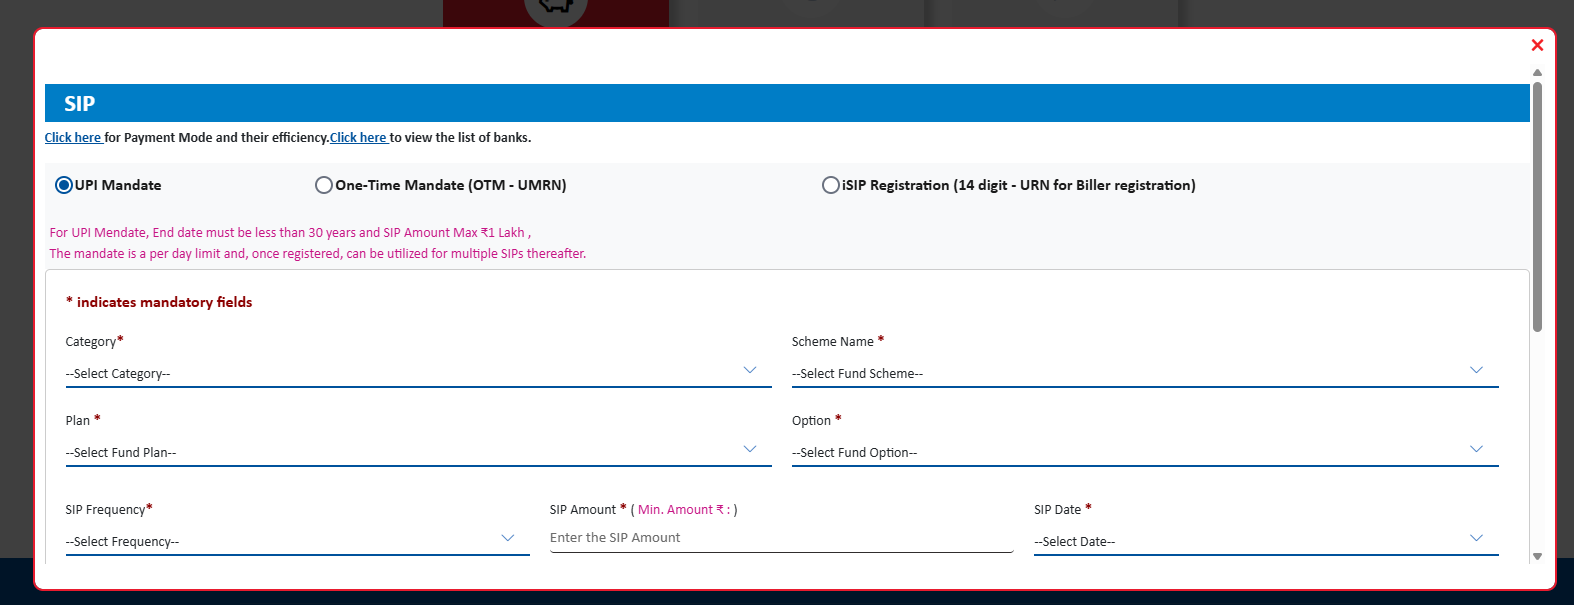
Step 4: Enter SIP Details
- Fill in all the mandatory fields.
- Once all the required information is completed, click Add to Cart to add the SIP to your transaction cart and proceed to the next step.
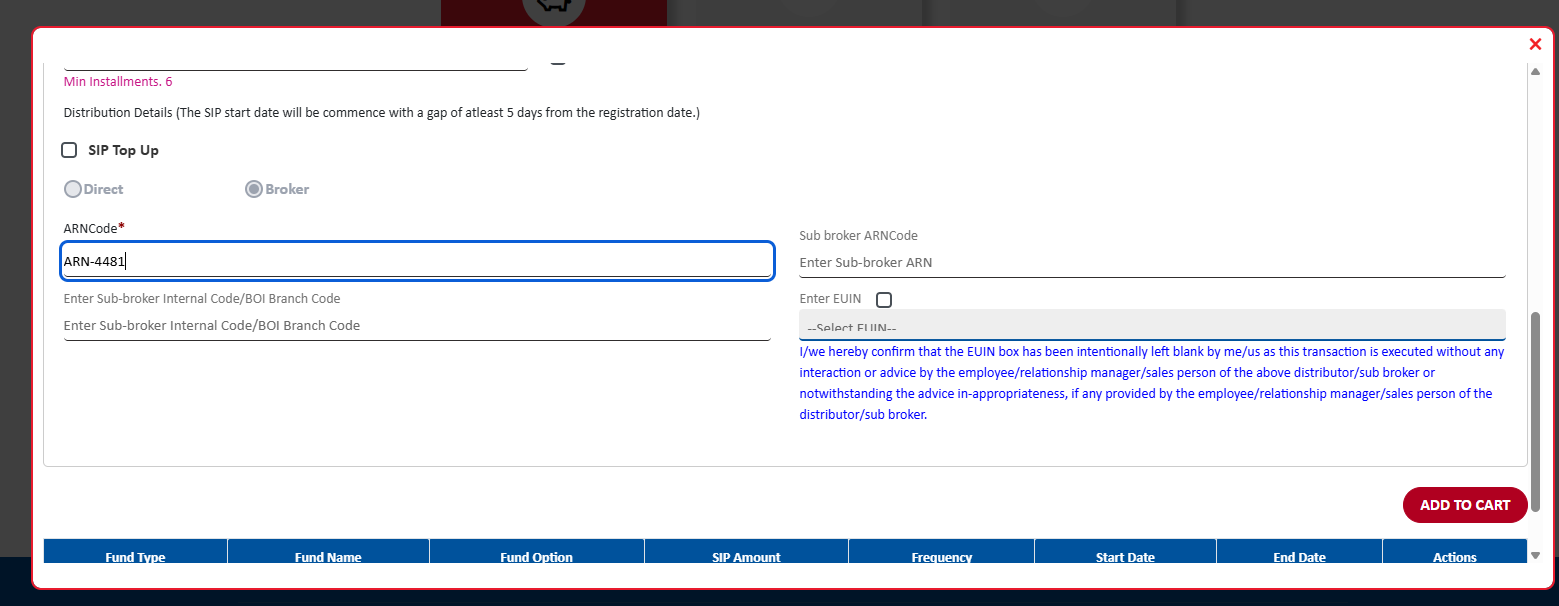
Step 5: Review and Submit the Cart
- Review the SIP details displayed in the cart.
- If the details are correct, click Submit to proceed with the SIP registration and complete the transaction.

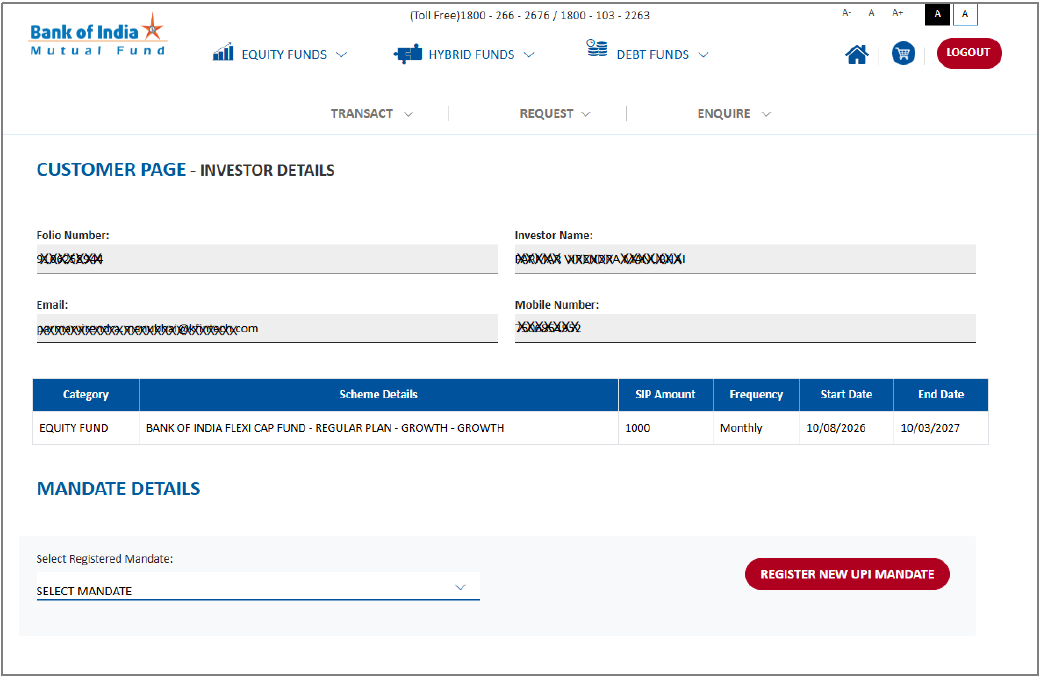
Step 6: Select Existing Mandate or Simply Register a New UPI Mandate
- Review the investor and SIP details displayed on the page to ensure they are correct.
- Under Mandate Details, simply select existing mandate or click Register New UPI Mandate.
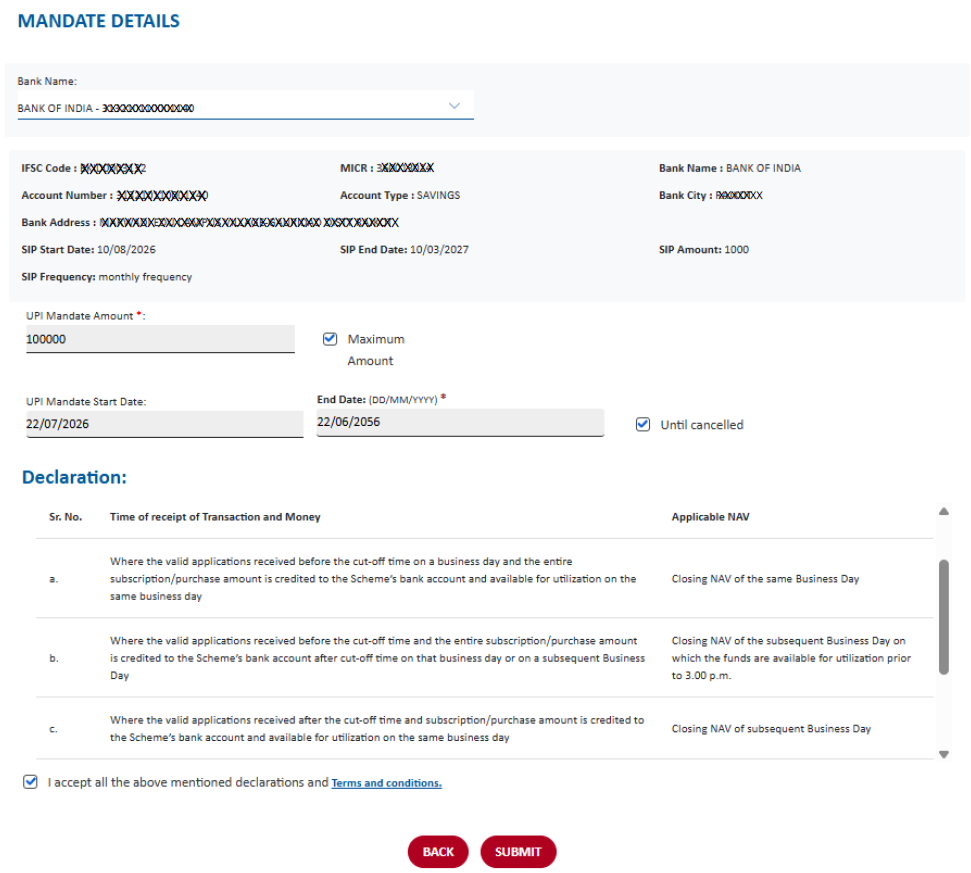
Step 7: Complete the UPI Mandate Registration
- Verify the pre-filled Bank Account and Mandate Details.
- Read and accept the Declaration and Terms & Conditions by selecting the checkbox.
- Click Submit to proceed with the UPI mandate registration.
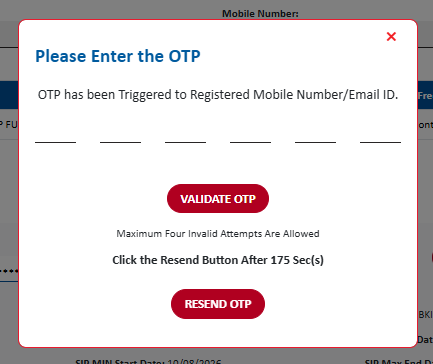
Step 8: Enter OTP which will be triggered to registered mobile number/email ID.
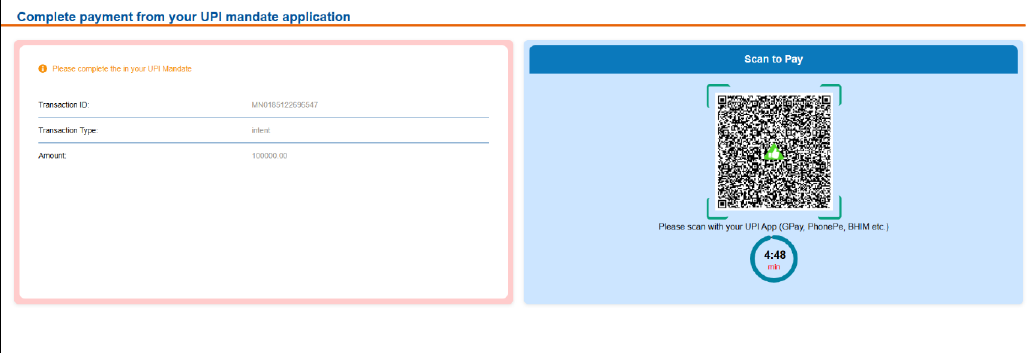
Step 9:Scan the Bar code using your UPI App such as gPay, Bhim to transfer the Fund. Ensure to use same bank which was submitted or mapped to Folio
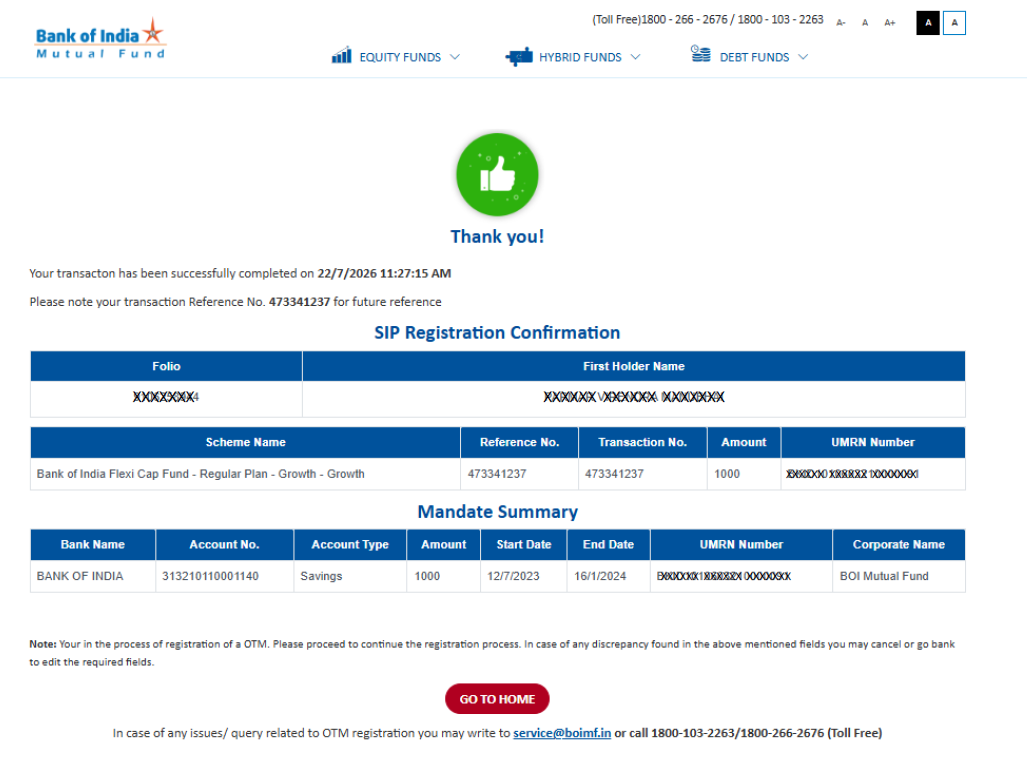
Step 10:Confirmation Screen.
Once the SIP registration is processed and the funds are transferred, a system confirmation will be displayed. Ensure to register with higher amount & longer tenure which can be used for multiple SIP registration later.